SpringCloud alibaba微服务实战三十七 - Oauth2.0 自定义登录接口
大家好,我是飘渺。
有不少人私下问我,为什么SpringCloud alibaba实战系列不更新了,主要是因为大部分核心功能都已经讲完了,剩下的基本是属于业务功能开发了,需要根据实际业务扩展。
今天更新文章的原因是粉丝提了个问题:如何实现Oauth2认证服务器自定义登录接口以及返回自定义格式? 这里我给大家分享一个简单且实用的方法,既可以灵活定制登录参数也可以自行组装返回结果。
实现方案
我们知道,认证服务器生成token的入口是TokenEndpoint#postAccessToken(Principal principal, @RequestParam Map<String, String> parameters),那我们就可以直接在认证服务器自定义一个登录接口,然后组装好TokenEndpoint#postAccessToken()需要的参数,直接调用它生成token后再封装成我们需要的格式即可。
接下来我们直接进入实战:
1. 定义登录参数
/**
 * 自定义登录参数
 * @author JAVA日知录
 * @date 2022/5/14 09:23
 */
@Data
public class LoginRequest {
    private String userName;
    private String password;
    private String grantType;
    private String mobile;
    private String smsCode;
}
为了兼容密码模式和自定义的短信验证码模式,我们将所有的参数都放入一个实体,大家可以根据自己的项目需要自行封装。
2. 创建一个登录类型的枚举
public enum LoginTypeEnum {
/**
* 密码模式
*/
PASSWORD("password"),
/**
* 短信验证码模式
*/
SMSCODE("sms_code");
private final String grantType;
LoginTypeEnum(String grantType) {
this.grantType = grantType;
}
public String getGrantType() {
return grantType;
}
public static LoginTypeEnum fromGrantType(String grantType){
return Arrays.stream(LoginTypeEnum.values())
.filter(item -> item.getGrantType().equals(grantType))
.findFirst()
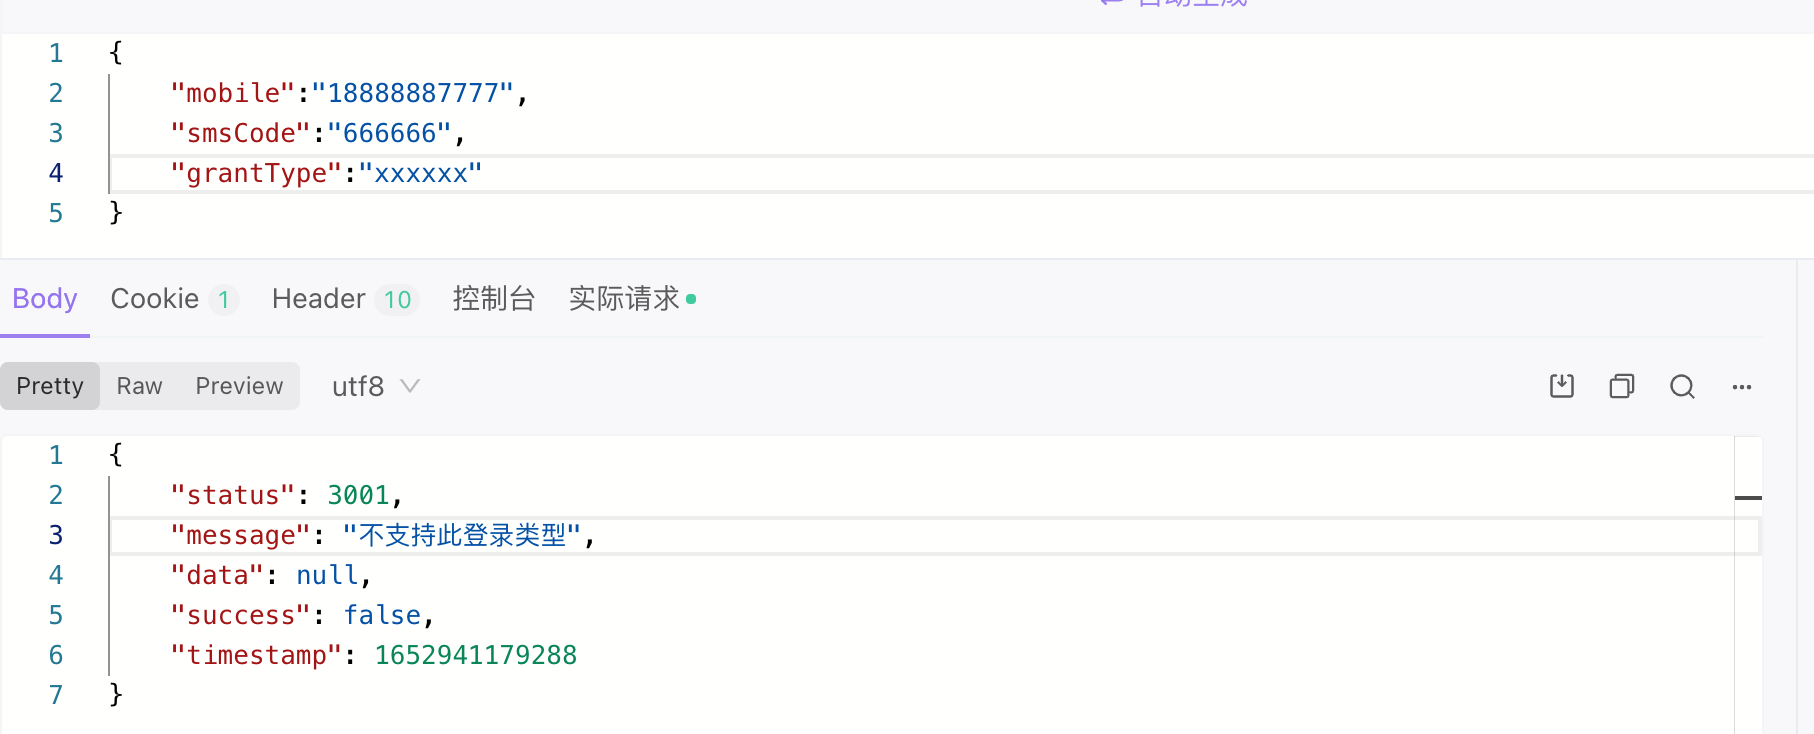
.orElseThrow(()-> new BizException("不支持此登录类型"));
}
}3. 创建自定义登录接口(关键)
@RestController
@RequestMapping("/token")
@Slf4j
@RequiredArgsConstructor(onConstructor = @__(@Autowired))
public class AuthController {
private final TokenStore tokenStore;
private final TokenEndpoint tokenEndpoint;
private final RedisTemplate<String,String> redisTemplate;
/**
* 自定义登录接口
* @return
*/
@PostMapping("login")
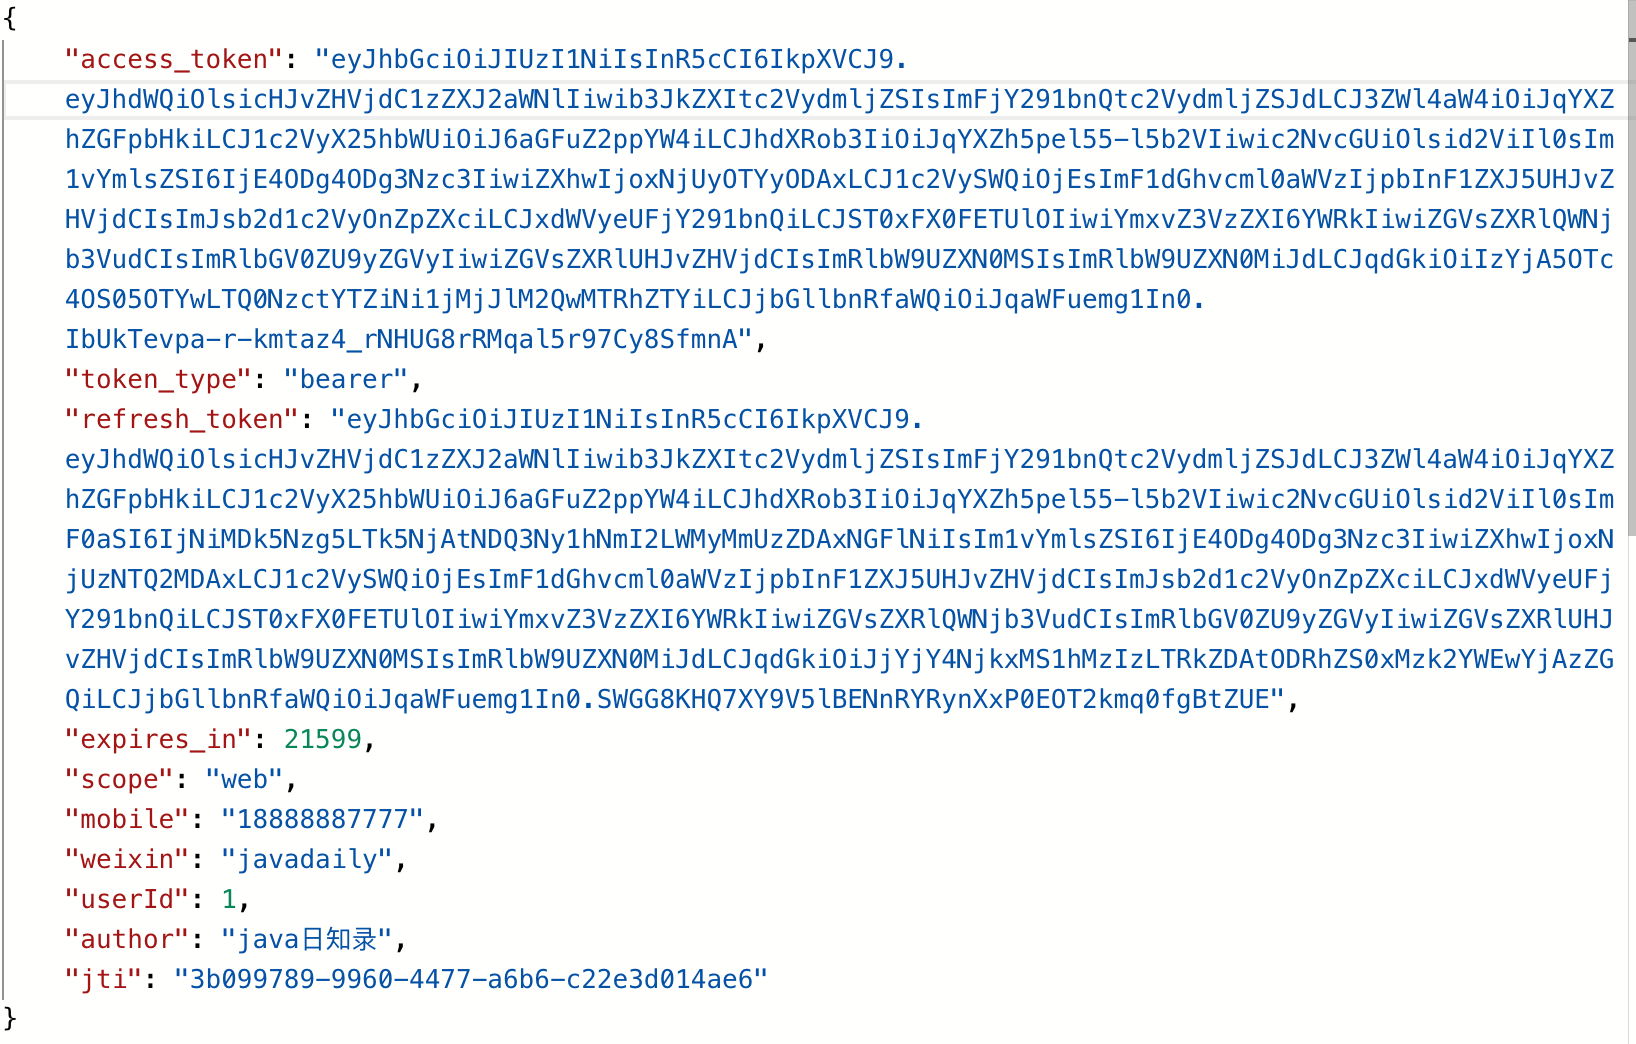
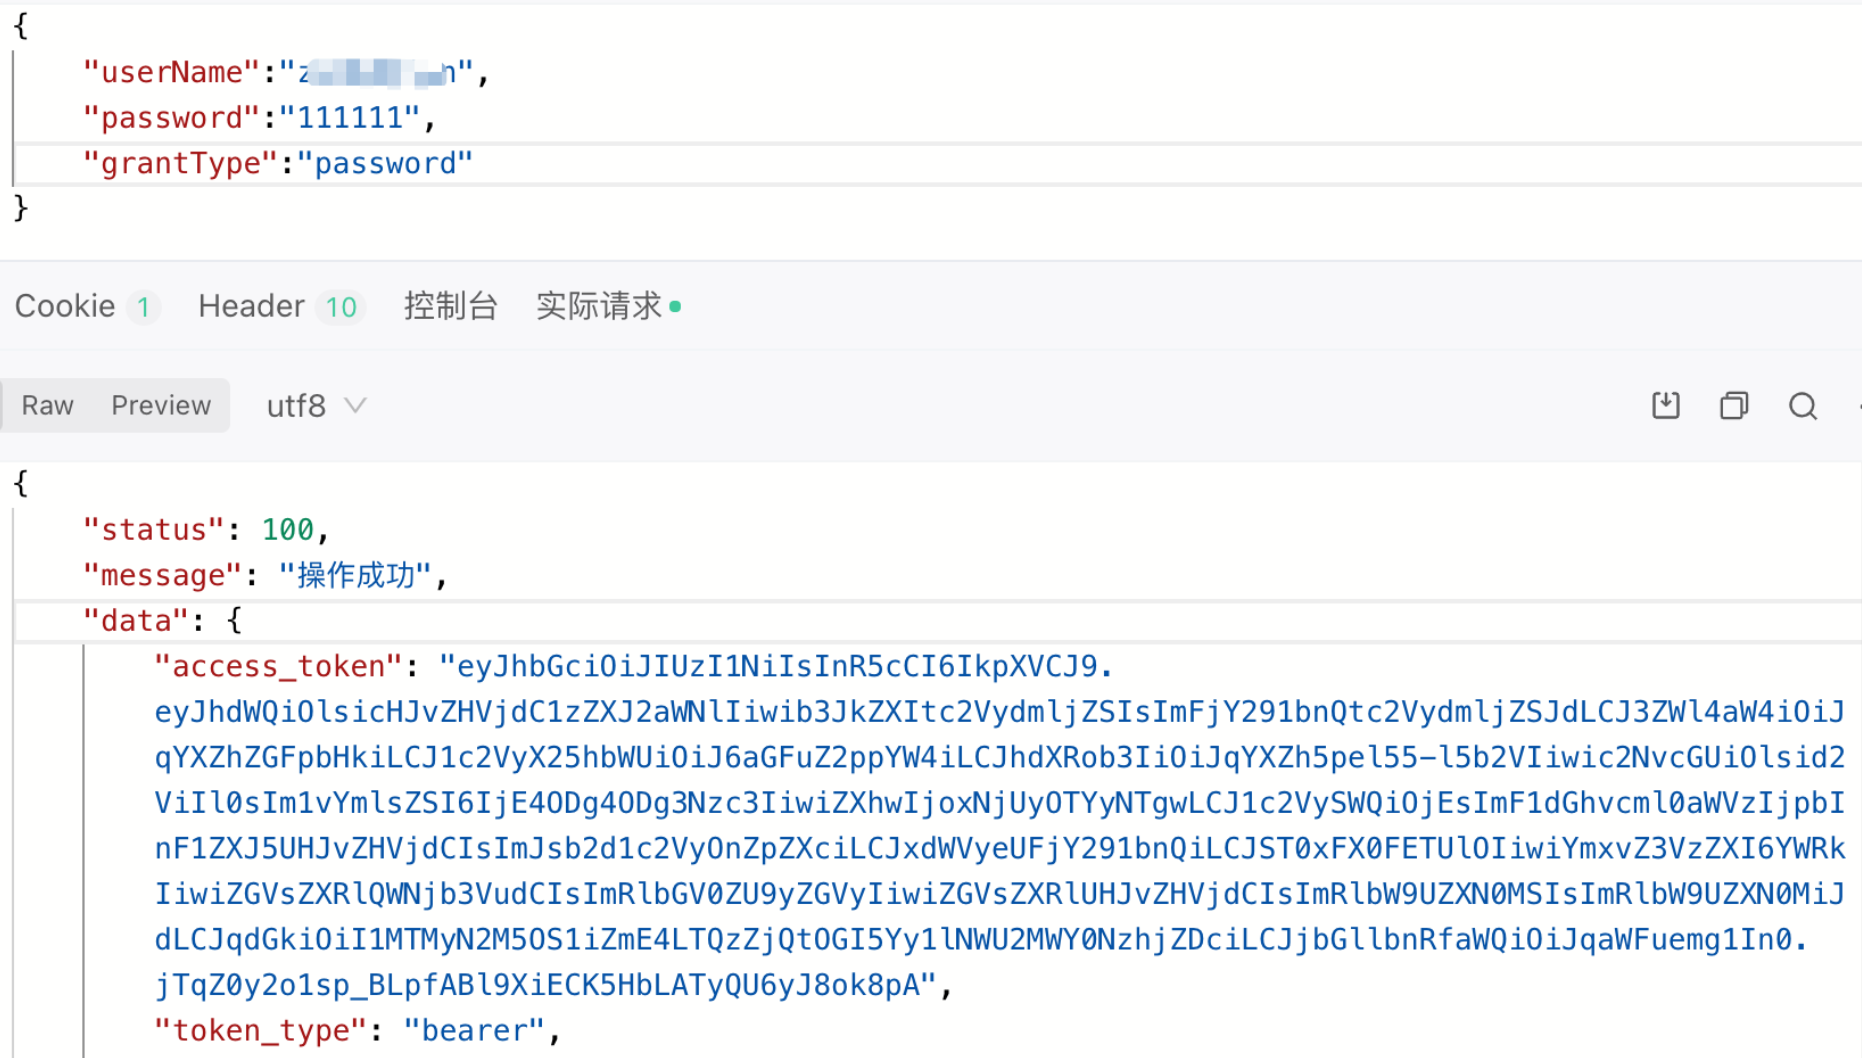
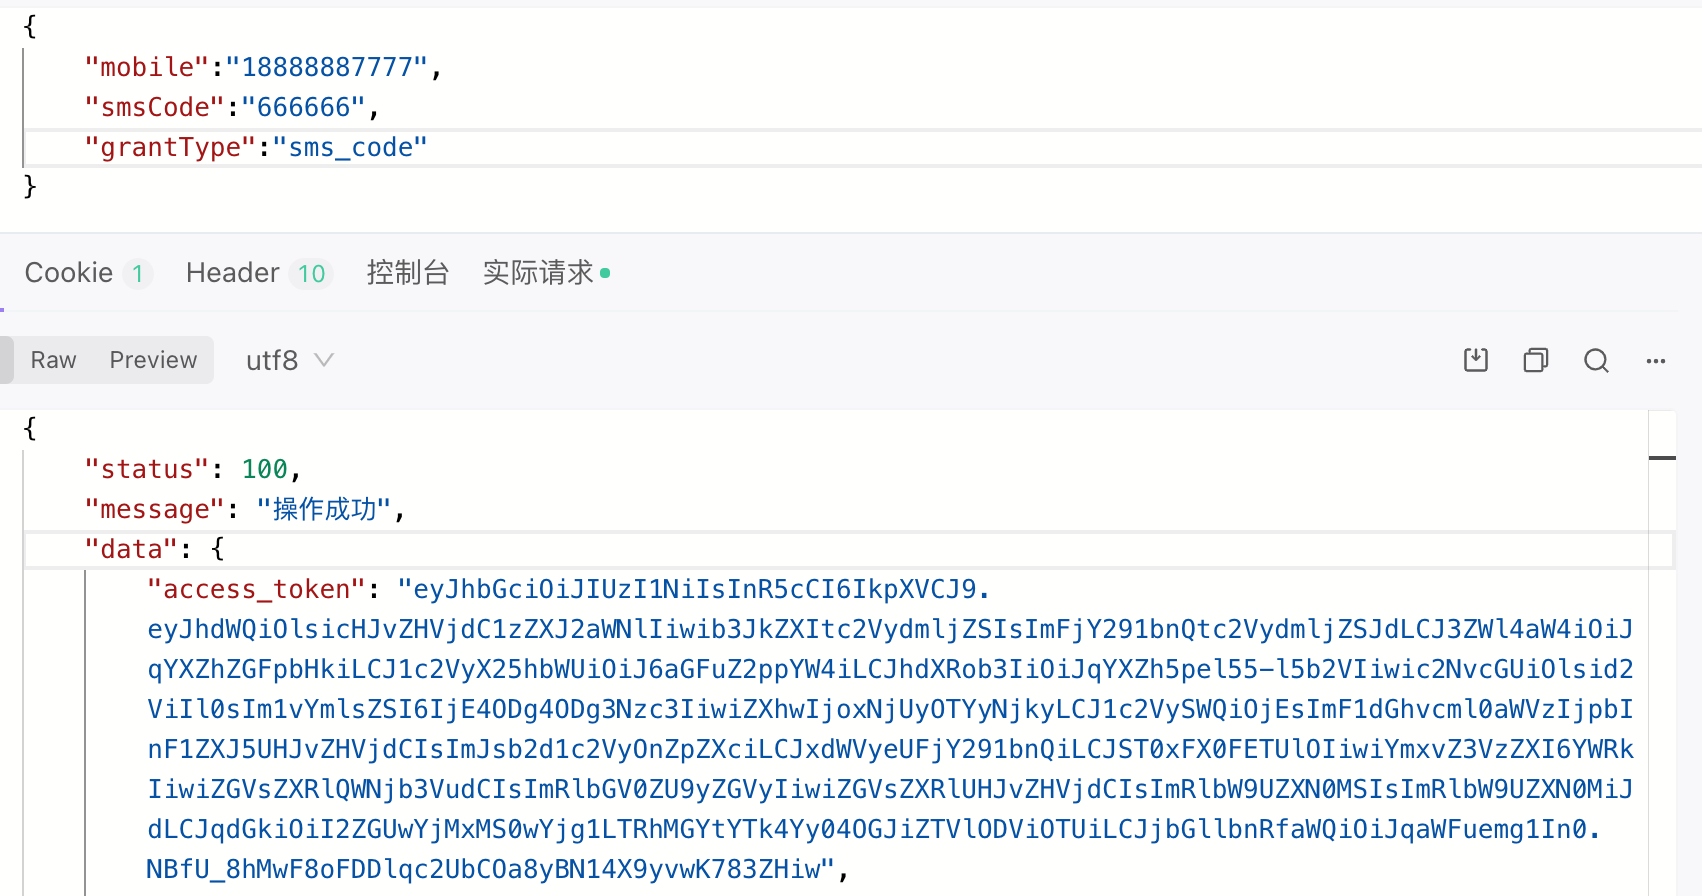
public ResultData<OAuth2AccessToken> login(@RequestBody LoginRequest loginRequest) throws HttpRequestMethodNotSupportedException {
Assert.isTrue(StringUtils.isNotEmpty(loginRequest.getGrantType()), "请在参数中指定登录类型grantType");
LoginTypeEnum typeEnum = LoginTypeEnum.fromGrantType(loginRequest.getGrantType());
//注入clientId 和 password
// 可以通过Header传入client 和 secret
User clientUser = new User("jianzh5", "jianzh5", new ArrayList<>());
Authentication token = new UsernamePasswordAuthenticationToken(clientUser, null, new ArrayList<>());
//构建密码登录
Map<String, String> map = new HashMap<>();
switch (typeEnum){
case PASSWORD : {
map.put("username", loginRequest.getUserName());
map.put("password", loginRequest.getPassword());
map.put("grant_type", "password");
break;
}
case SMSCODE:{
map.put("smsCode", loginRequest.getSmsCode());
map.put("mobile", loginRequest.getMobile());
map.put("grant_type", "sms_code");
break;
}
default: throw new BizException("不支持的登录类型");
}
OAuth2AccessToken oAuth2AccessToken = tokenEndpoint.postAccessToken(token,map).getBody();
return ResultData.success(oAuth2AccessToken);
}
...
} 这里我们将TokenEndpoint注入,然后伪装一个客户端的认证流程,调用TokenEndpoint.postAccessToken()获取接口。
这里我们写死了client信息,实际上也可以通过Header请求头传入或者通过配置文件注入。
4. 在安全配置类中放行登录接口
@EnableWebSecurity
@EnableGlobalMethodSecurity(prePostEnabled = true)
@Configuration
public class WebSecurityConfig extends WebSecurityConfigurerAdapter {

		...
    @Override
    protected void configure(HttpSecurity http) throws Exception {
        // 加入验证码登陆
        http.apply(smsCodeSecurityConfig);

        http
                .authorizeRequests().requestMatchers(EndpointRequest.toAnyEndpoint()).permitAll()
                .and()
                .authorizeRequests().antMatchers("/token/**","/sms/**").permitAll()
                .anyRequest().authenticated()
                .and()
                .csrf()
                .disable();
    }


    @Override
    public void configure(WebSecurity web) throws Exception {
        web.ignoring().antMatchers(
                "/error",
                "/static/**",
                "/v2/api-docs/**",
                "/swagger-resources/**",
                "/webjars/**",
                "/favicon.ico"
            );
    }
}这个安全配置类中有两个放行策略,一个通过permitAll()实现,一个通过web.ignoring()实现,他们两个的区别是:
web ignoring()比较适合配置前端相关的静态资源,它是完全绕过spring security的所有filter的;permitAll(),会给没有登录的用户适配一个AnonymousAuthenticationToken,设置到SecurityContextHolder,方便后面的filter可以统一处理authentication。
{
"userName":"zhangjian",
"password":"111111",
"grantType":"password",
"mobile":"18888887777",
"smsCode":"666666"
}
测试
1. 自定义密码登录
2. 自定义短信验证码登录
3. 不支持的登录类型
小结
本文提供的方案是将登录接口与认证服务器放在一起,如果在项目中由于某些原因不方便将其放在认证服务中,也可以直接在服务器提供一个Feign接口,然后让后端服务调用此接口进行认证即可。